MIX PLAY EAT
  • Menu
  • Blog
  • Contact

Pasta with Roasted Broccoli

12/13/2018

5 Comments

 
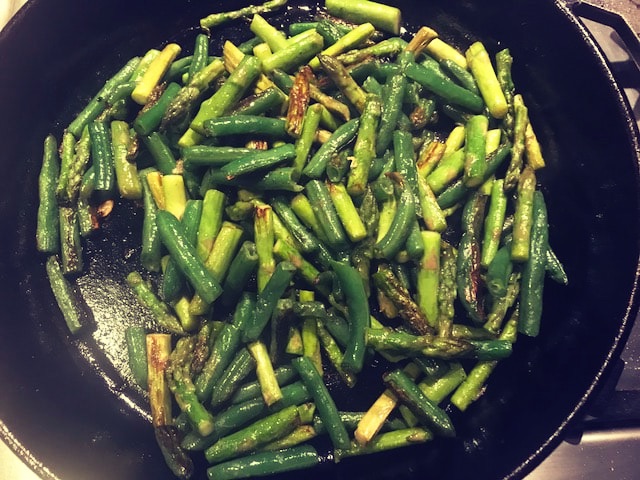
Roasting broccoli instead of steaming it adds crunch and a rich, nutty flavor to this super simple dish, which can be prepared in twenty minutes flat, and, in my experience, is always a hit with kids.

Here's how to pull this weeknight comfort food together in a flash:
  • Boil a large pot of water for your pasta, and cook according to package directions. 
Note that if you use fresh pasta, widely available in the refrigerated section of grocery stores, cooking time is reduced to just a couple of minutes; an extra time-saver if you need it.
  • To roast the broccoli, preheat your oven to 400 degrees.
  • Wash and thoroughly dry broccoli florets, about a cup per person. Kids starting in preschool can handle this for you.
  • Season well with salt and pepper, and toss in a bowl with a hefty drizzle of good olive oil and roughly chopped fresh garlic cloves. Depending on your taste and preference, you can go heavy or light on the garlic. We use about two medium cloves per person, or per cup of greens.
  • On a lined baking sheet, spread out the broccoli and roast for 8-10 minutes, turn it once, and repeat. Do not overcook, as the garlic can burn and the broccoli, at this heat, will be done quickly.
  • When pasta is al dente, drain reserving a cup of cooking liquid.
To pull it all together, toss pasta with the garlic and broccoli, adding a bit of reserved cooking water and an extra drizzle of good olive oil, for moisture. Serve with freshly grated parmesan cheese. 

Enjoy!

5 Comments

Ultimate Turkey Sandwich

11/16/2018

3 Comments

 
Picture
If you're wondering what to do in 48 hours when you're left with pounds of leftovers, or just looking for something simple, versatile and really good to bring your lunch game to the next level, try this: Turkey or chicken salad sandwich, with all the fixings of a complete fall feast.
To prepare, shred or cube leftover roasted poultry, mix with a bit of mayo (we use a vegan version), and a small amount of Dijon mustard (1/2 a teaspoon, or so, for one sandwich), and stir until well combined.
Toss in crunchy celery chunks and a handful of dried cranberries, and pile on to whole grain or whole wheat sourdough toast, with a layer of thinly sliced apples for some extra acidy, juiciness and crunch.
If you like apples, you probably have your own favorite varieties, but if you're looking for suggestions, try a Piñata red, a Honey Crisp, or a green Granny Smith. Asian pear slices also work really well and add a nice twist. 
You may never look at a bird, or your lunch bag, the same way again. 
3 Comments

French Onion Soup

11/12/2018

2 Comments

 
There's little more satisfying that buying a boring bag of onions, cooking them down to a brown pulp with nothing but a pinch of salt and some serious patience, and turning them into easily the most flavorful, satisfying cold-weather dish of the season: French onion soup. The end result tastes like a beef-stew-meets-cheese-fondu party in your mouth, with every messy spoon full. This recipe is very much inspired by Keller's Bouchon recipe, but tweaked to simplify and cut back just a wee bit on the multiple pounds (yes, pounds) of onions required, because there are only so many onions I can fit in my grocery bag, or my stomach, at a time. But maybe that's just me. 

Ingredients: (Serves 4)
4 pounds of yellow onions (about 4 large or 8 small onions) peeled and finely sliced lengthwise (not diced)
3 quarts of beef stock
one french baguette, or sourdough, if you prefer (stale bread works too)
8 thick slices of Gruyere or Emmentaler cheese
2 tablespoons of butter
2 tablespoons of olive oil
1 teaspoon sherry wine vinegar or white wine vinegar
1 tablespoon flour
Kosher salt

For sachet: 
(Place these on a square of cheesecloth and tie with cooking twine into a bundle. See the slideshow for images of how my daughter did this, above).
8-10 black peppercorns
2 bay leaves
4 sprigs of thyme
2 sprigs of sage optional

To prepare: 
In a large stock pot, warm and melt the butter with the olive oil over medium heat. Add the onions and 2 teaspoons of salt and stir often over low heat for about 1.5 to 2 hours, until they have cooked down to a dark brown caramelized mush. (See photos in slideshow above). As you cook them, be sure to scrape the sides of the pan so that it doesn't burn, and to keep the heat on low.
Add the flour, turn heat up to medium, and cook stirring another couple of minutes.
Add the beef stock and the sachet, and bring to a simmer.
Cook, simmering for about 30-45 minutes, until the stock has reduced and the flavor is rich and deep.
Meanwhile, preheat your oven to 300 degrees.
Slice your baguette (we like fairly thick slices but you can go thin if you prefer), place them on a lined baking sheet, drizzle with olive oil and season with salt and pepper, and toast these on both sides, flipping once after a few minutes and being careful not to burn any as I usually do.
To assemble soup and bring it all together, ladle in to oven-safe individual bowls, add toasted baguettes slices (see images above), and top with cheese slices. (We prefer Gruyere cheese, though some may find this a bit strong. Traditionally, most people use Swiss Emmentaler.)
Place bowls on a lined baking sheet to catch any dripping soup or cheese, and slide under the broiler for just a couple of minutes until the cheese topping is fully melted and bubbling, but again, be very careful not to burn it during this step.
Because after all these hours of work, it would be a shame to make the soup, but not get to eat it, too.

A large mixed green salad, with apple or pear slices, some dried cranberries and crunchy nuts and a sherry or white wine vinegar dressing, pairs really nicely with this hearty, rich dish, and adds some crunch and acidity to cut through the heaviness of the cheese, we find. 

Bon appetit!

2 Comments

The Simplest Roasted Squash

9/16/2018

5 Comments

 
People, it's pumpkin season. (For the record, a pumpkin is a type of squash). And of all the things I relish about shopping at farmers' markets, what tops my list is getting surprising, and always useful, cooking tips from the farmers themselves. The other day, at the massive weekly Grand Army market in Brooklyn which we've been frequenting for about a decade now, I asked about roasting pumpkin, because here's a food that's rich, flavorful, versatile and so good--but definitely not the easiest to prepare, given the awkward round shape, the size and hardness of it. Here's the delicious, could-not-be-simpler method this vendor, whose name I didn't catch over the barking of my dog, and banter of my kids, kindly shared:
Preheat oven to 375 degrees.
Wash squash well and cut in half, scooping out seeds.
Place flesh down in an oven-safe pan, and roast for 30-50 minutes, depending on size.
When done, flesh will be soft and mushy, with no hardness left.

Once roasted, you are left with a wide menu of tasty ways to enjoy this:
1. Just mash it (discarding skin, of course) with a fork and a drizzle of olive oil, salt and pepper. (Perfect baby food, but also great as a base for pretty much any supper.)
2. Blend it with a little stock, and, if you wish, some aromatics and savory herbs, like shallot, garlic, and thyme, to make a simple, flavorful soup.
3. Use in baking.
4. Cube and add to finished stews or soup.

However you use this, I hope you'll enjoy the simplicity of this cooking hack, right in time for the end of summer. It's useful for any squash, and has already cut our meal prep time down by 10 minutes or more, multiple times, in just the last week.

5 Comments

Skate Wing with Capers

9/5/2018

1 Comment

 
School starts today, and that means dinner needs to get on the table quickly, and it better be special, delicious, and nutritious--or else. And what could be more special and easy than eating the wing of a fish that tastes like lobster, AND has no bones to pick out? The key is simply not to overcook this, or the fish will become quite chewy. If you get it right, it is melt-in-your-mouth tender, just like baby food. (And I'm happy to report our infant will gobble down his own wing, right there with us.) Here's how we make this. If you've never tried it, we highly, highly recommend it. 

Ingredients:
About 1/3 pound of fish per person (less for babies, of course, although ours has eaten close to a quarter pound of fish, some meals....)
Flour
Butter
Capers
Lemon 

To prepare:
Rinse fish and pat until very dry with a paper towel. Season well.
Warm your oven to 225 degrees, as you will need to cook the wings in batches, given that they are not small. As you cook them, place them on a baking sheet and keep them warm until all are done, and ready to serve. But do not keep them in the oven any longer than necessary to cook the rest of the fish.
Prepare a shallow dish of flour, also seasoned with salt and pepper. 
Flour the fish on both side, patting off any excess before cooking each wing.
Heat a skillet over a high flame and drizzle with oil. Add a pad of butter to the pan, then add the fish. Your pan should be hot enough that the butter foams quickly, and you hear a nice sizzle when the fish hits the skillet.
Cook on medium high heat, flipping just once after about 3 minutes. 
Cook the other side for the same amount of time. As there are no bones, and the wings are thin, they cook very quickly.
Keep warm in the oven while you cook the remaining wings.

For the sauce, once the fish is all cooked and in the oven, simply add two tablespoons of butter to the empty skillet and a small handful of capers. Let simmer just a few moments, until the butter turns light brown and you can smell the capers warming.

Serve the skate wings with your preferred sides. We love mashed potatoes and squash, or other greens with this. Drizzle the fish with a little brown butter and capers, and serve with a squeeze of fresh lemon.

Enjoy!


1 Comment

Black Bass with Sage Butter

7/19/2018

2 Comments

 
This dish is all about a simple, game-changing technique I learned from my husband, the real chef in our family. (See  cooking directions below for details.) Black bass is a delicious, small-sized fish which is caught right near us, in the north Atlantic, so it's always available at our farmer's market, and it's almost a weekly staple for us. Not only is fish, in general, tasty and good for you, it's also quicker and simpler to prepare than pretty much any other protein, I find, and therefore a great option for busy families. And by just adding a few sprigs of fresh herbs, like sage, in this case, you can add tons of flavor and enjoy a truly delicious meal in no time, any day.

Ingredients:
Count about 1/3 to 1/2 a pound of fish per person, depending on how hungry you are 
A couple nice sprigs of fresh sage, rinsed and dried
Olive oil
Butter
(Sides of your choice)

To prepare:
Make sure all fish scales and bones have been removed.
Rinse the fish, dry it well, and gently slash the skin side a couple of times with the tip of a sharp knife to keep it from curling as it heats and cooks. (If you forget this step, as I often do, don't worry. The fish will taste and pretty much look the same).)
Season both sides with salt and pepper.
Meanwhile, pre-heat a heavy skillet over high heat for a couple of minutes. Drizzle enough olive oil to coat the bottom of the pan, and arrange fish skin side down in the hot pan--then immediately reduce heat to medium-high (you want a nice, strong sizzle when the fish hits the pan, though). 
After two to three minutes, add a tablespoon of butter and the sage to the pan. Now here's the technique that makes this dish come together and taste amazing in minutes: Tilt the pan up, holding the handle, so that the butter and sage pool down on the opposite end of the pan. This allows you to grab a spoon and quickly baste the fish with the sage-infused butter.
Baste for about a minute or two, making sure to give. each fillet a few good coatings.
Lower the pan back down onto the stovetop, and gently flip the fish. (Not only does this trick add all the flavor to the fish, it also prevents it from sticking to the pan, when you flip it. Genius!)
Allow fish to cook over medium heat just another 2 minutes, or until cooked through.

Serve immediate, with one last drizzle of sage butter, and sides of your choice. We often opt for couscous and greens, which takes mere minutes, because weeknight are so hectic.

​Enjoy!
2 Comments

Pasta with Sausage, Tomatoes and Basil

7/17/2018

2 Comments

 
Picture

This is a family-favorite weeknight dinner of ours, and so simple to make, you hardly need a recipe. You can change the overall taste depending on the type of sausage you use, obviously. Our local butcher sells several homemade delicious options including sweet pork sausage, fennel, and spicy ones, which we alternate using when we make this pasta dish. The sauce freezes well too, and is great to have on-hand for a rainy day.
To prepare, boil a large pot of water to cook your pasta in, and in the meantime, make this quick sauce. You'll need one large can of whole peeled tomatoes, and  about one and half pounds of Italian sausage (of your choosing). I often add a small chopped onion and  / or a few garlic cloves, which I sauté in little olive oil before crumbling the meat out of the sausage casing into the pan-- but you can skip this extra step; the  sauce will still be rich and hearty.
Brown the meat over medium heat in a saucepan or deep skillet, then add 1 to 2 tablespoons of tomato paste, and stir another minute or two. Next, add a splash of white wine and let it reduce another couple of minutes before adding your can of tomatoes. (As your stir the sauce, over time, the whole tomatoes will slowly break up.) Simmer, stirring often, about 20 minutes, and finish with a swirl of heavy cream. 

​Serve over freshly cooked pasta with fresh, torn basil leaves.


2 Comments

Charred Greens with Ginger and Garlic

7/12/2018

3 Comments

 
Picture

This dish is inspired by something I eat regularly when we order Chinese food: Wok charred greens. We don't own a wok, however, so I used our trusty old cast iron skillet, which also gets extremely hot, and was therefore effective enough to pull this tasty side dish together quickly. You can make this dish with a variety of greens, but it tasted great with this combination of string beans and asparagus. You can prep it ahead so it will only take a couple of minutes to finish up before serving, and you can serve it hot or room temperature, if you are eating outside in summer, say. It goes perfectly with any protein, really, from white fish or salmon to shrimp, chicken, pork or beef and is one of those savory crowd-pleasing dishes which no one can get enough of, so double the recipe if you are feeding more than 4 people. Here's how to make it:

Ingredients:
1 large package of trimmed green beans, cut into 2" strips
1 bunch of asparagus, cut into 2" pieces (discard the too-chewy very bottom ends, though)
3 garlic cloves, peeled and chopped
1 tablespoon freshly grated ginger
2 1/2 tablespoons cooking oil (such as grapeseed, peanut, canola or even olive oil, depending on what you have / your taste)

To prepare:
Steam or blanche the vegetable for about 4 minutes, or until bendy but still quite crunchy. 
Heat oil in skillet and add vegetables with garlic and ginger. Season with salt and pepper and stir over high heat for another 4 minutes or so, until greens get a nice charr (but do not burn!)
Garnish with a sprinkle of sesame seeds or chopped fresh scallions, if you wish, and serve with your choice of protein and  / or grains.
Enjoy!

3 Comments

Ridiculously Effortless and Delicious 3-Ingredient Tomato Sauce

6/12/2018

0 Comments

 
Because we have a new baby at home whose name happens to rhyme with Ridiculous, and also because I've exactly  4.25 minutes to make dinner these days, I'm digging deep into my hazy repertoire of dishes-I-love-that-are-ridiculously-simple. Here is a perfect example: The ultimate, rich yet effortless (literally) three-ingredient tomato sauce--mostly to use with standard dry or fresh pasta, but also great for frozen ravioli or rice.
The best part of this dish is perhaps not only the two minutes it takes to dump the 3 ingredients in a pot, or the fact that a 6-year-old can do this (for you), but also that these three ingredients are things that, along with dry pasta, pretty much anyone who has a kitchen and owns a chef knife tends to have in the fridge and pantry at all times, even if you are about to leave the country for half a month (possibly, forever) as we are, have not cooked in days, even weeks, or just plain old can't stand making dinner. Ever.
Before I detail the three ingredients and super simple cooking method for this dish below, I will confess that, in addition, this evening I am adding three small fresh bay leaves to my sauce. Not because you need them, or the sauce needs them, but simply because my mother, bless her, literally uprooted her enviable bay leaf plant right out of its pot, tossed it in a cardboard box, lose soil and all, and shipped it to me as a birthday "surprise" last month. (When the package arrived, from the dark dirt sprinkling through the seam of the box onto my shoes, and baby, and also coloring the clear packing tape, I had a small hunch something special had come my way––unfortunately not a hunch I listened to, as I opened said box right on our newly cleaned rug). So, dirt aside, bay leaves abound in our home at the moment, and before we skip town, I'm determined to enjoy this gift every way I can. You definitely don't need to follow suit to enjoy this meal, however.

Ingredients: 
1 large can of whole peeled tomatoes
5 tablespoons of butter (about 2/3 of stick)
1 medium yellow onion, peeled but KEPT WHOLE
Pasta, rice or ravioli to serve with 

To prepare:
Simply put can of tomatoes, whole peeled onion, and butter, in a sauce pan, season with salt and pepper, bring to a simmer and cook over medium low heat, stirring occasionally, while your pasta water boils and pasta cooks--about 20-25 minutes.
Meanwhile, boil large pot of salted water for your pasta, and cook pasta of your choice according to package directions.
Strain pasta when done, reserving about 1/2 cup of the pasta water. 
Toss pasta in sauce, adding a little pasta water, until you reach the desired saucy consistency.
Serve immediately with a few fresh basil leaves if you wish, and freshly grated cheese.

Enjoy!
​ 

0 Comments

Mushroom Toasts

5/23/2018

2 Comments

 
Mushrooms are having a moment, finally, and I couldn't be more excited, because everyone in this household loves them, in every shape and form. We tend to cook mostly with a mix of fresh shiitake, cremini, chanterelles, and dried porcini, because that's what's readily available around us, but if you like mushrooms, odds are, you enjoy them all. Today the farmer's market was selling fresh shiitake so that's what I used for these quick toasts--a perfect lunch, brunch treat, or party appetizer--but feel free to use a mix of fresh mushrooms or whichever are your favorite instead. What I love about this dish is that it takes just minutes to pull together, even if it requires a few steps. And it tastes like a special treat, any time of day, because simple and delicious as this dish is, you'll almost never find it on a menu, (despite the popular $14 avocado toast I'll never quite understand.)

Ingredients:
Fresh mushrooms, rinsed, dried, and sliced. (I used about 4-5 medium shiitake per person, for this dish, or a couple of  handfuls)
Note: While most mushroom stems are edible, if you use shiitake, as I did here, you must remove and discard the entire stem. 
1 to 2 medium garlic cloves, per person, peeled and minced
Fresh parmesan cheese (Fontina or milder fresh mozzarella also work well)
Sliced baguette
Olive oil
A little butter
Fresh thyme for garnish (optional)

To prepare:
Heat a cast iron or other heavy skillet over medium heat. Drizzle pan generously with olive oil, and add a tablespoon of butter per batch of mushrooms.
The key to perfect pan roasted mushrooms is this simple technique: Cook mushrooms in batches in a single layer, without stirring, to let each side quickly brown. It only takes a couple of minutes per batch (and one batch is enough for about 3 people, in a medium sized pan). 
Also, hold off on adding the garlic until the last couple of minutes so it won't burn, and don't season the mushrooms until after they cooked, otherwise the salt will release moisture in the pan during the cooking process, and they will be less crispy. (Not a catastrophe, of course, but just not quite as good.)
When you flip the mushrooms to cook the other side, (using tongues is the quickest method), stir the garlic around as well, so it doesn't burn.
Meanwhile, slice your bread (either thick or thin, depending on your preference), drizzle with olive oil, season with salt and pepper, and toast for just two minutes or so under the broiler on a sheet pan, until lightly golden-brown.
Top the toasts with the roasted mushrooms and a sprinkle of fresh thyme, if you wish.
You can serve the toasts this way, or take it one step further and add a sliver of fresh parmesan cheese, or a bit of grated fontina or fresh mozzarella.
If you add cheese—a nice way to pack a little more protein in the meal, if this is lunch or brunch—slide the toasts back under broiler for just another minute until the cheese is melted.
Serve and enjoy hot or room temperature. I find the toasts without cheese taste better room temperature, while the cheese version is best if eaten immediately.

Enjoy!

2 Comments
<<Previous


    ​Related Articles
    ​

    For the New York Times for Kids, I reported on tasty ways 5 Different Hot Chocolates from Around the World are prepared and savored. 

    For the Washington Post Kids Post, I spoke to an edible bug expert in Brooklyn, and wrote about how we can eat our way to sustainable future—with an important caveat and warning at the end, for those of us with food allergies!

    This old-school parenting hack I wrote about for LifeHacker will make your breakfasts a breeze, and allow for two family meals, some days.

    My essay about leaving my career to cook for my allergic kid, published by Allergic Living magazine.

    My essay about the challenges of holidays with How the Grinch almost stole our gingerbread house.
     

    About the Author

    I'm Lorraine Allen, and when our daughter was diagnosed with multiple severe food allergies in infancy, a decade ago, I decided to freelance from home so that I could also care and cook for her. Because I grew up all around the world, it's important to me that she be able to enjoy all sorts of international food.  I've learned, throughout this process, that even a large number of severe allergies and restrictions does not stop a person from eating well. On the contrary, by forcing us to focus so much attention on what we consume, we've gained a whole new appreciation for good food, and ironically, we all enjoy a healthier diet than before this diagnosis. This site is where we share some of our delicious egg-free, nut-free, shellfish-free (and often vegan and gluten-free) experiments and successes in the kitchen. Guten Appetit and thanks for reading!

    RSS Feed

Powered by Create your own unique website with customizable templates.