MIX PLAY EAT
  • Menu
  • Blog
  • Contact

7-Minute BBQ Chicken

5/22/2018

3 Comments

 
If it's been a while since I've been able to share recipes here, it's because we went and had.... A BABY! He's still toothless, but just dipping his ridiculously cute big toe in the world of solid foods, and so far, I'm happy to report, he will eat pretty much anything. (Although watermelon is the definite favorite). Given this new addition (read: time suck), not only have I no time to post here, I barely have time to eat, let alone cook, or write about cooking, or photograph said cooking in any appealing way, unfortunately. But our older kid, whose allergies inspired this blog years ago, has been clamoring for some love on this site, and also, mainly, for good food (specifically, barbecue, now that the weather is finally warming up.) So here's what all this amounts to: The making of the 7-minute BBQ dinner*. Before the baby wakes up (again), here is the super fast, super tasty recipe, perfect for the upcoming Memorial Day weekend, or any old night you're craving some good, quick food.

* And by 7 minutes, I mean 7 minutes of effort, not of actual cooking time. Because of course, chicken does not cook in 7 minutes.

Ingredients:
Chicken drumsticks, wings, and / or thighs (Depending on your preference.)
White rice and greens of your choice to serve with

For the 7 minute BBQ sauce: (If you're not as pressed for time as I am the moment, feel free to slow down and cook a little longer, if you wish!)
Note: You can easily double or triple this sauce recipe, and keep it handy in your fridge for a couple of weeks to save even more time down the road. 
1.5 cups tomato ketchup
1/2 small onion, finely chopped
2 cloves of garlic, minced
1 tablespoon worcestershire sauce
1 1/2 teaspoons mustard (Dijon or the like)
2 bay leaves
2 tablespoons apple cider or red wine vinegar
1/4 cup molasses (if you don't have any handy, sugar, preferably brown sugar, works too)
Hot sauce (optional, and to your liking)

To prepare:
Preheat oven to 375 degrees.
Season chicken well with salt and pepper, and roast on a roasting pan until cooked, about 30-35 minutes for drumsticks, less for wings, and a bit more for thighs (I rely on our trusted meat thermometer to make sure the chicken is cooked through).
While the chicken roasts, you can prepare the rice and salad.
For the super fast sauce, sauté the onion and garlic in a little olive oil or butter for just a couple of minutes on medium heat, then toss in all the other ingredients, whisking well to combine, and continue cooking about 5 minutes more, stirring a few times.

To serve, either pour the sauce over the cooked chicken and toss it well, or let everyone choose how much sauce they want, serving it on the side (which we do). However you eat this, be sure to have a supply of napkins at the ready before you dig it. It's a tad messy, but it's so good.

If you're looking for the perfect 5 minute desert to top this meal off with, I highly recommend our beloved, refreshing watermelon and mint salad.

Enjoy!

3 Comments

Zucchini

7/18/2017

2 Comments

 
Picture
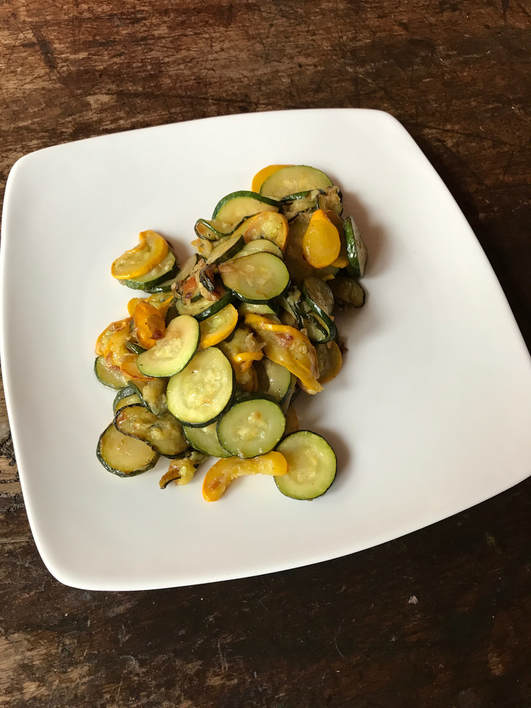
My kid and I have never been real fans of zucchini, but they are so abundant at the farmer's markets these days, it seems a shame not to give them another chance. Recently, we were at family pool party and someone made the most delicious sautéed green and yellow zucchini as a side dish, so we got the recipe, and have now been enjoying the same dish at home on a regular basis. Turns out the trick to coaxing loads of flavor out of these bland veggies is simple: Cook them on low heat for a long time, gently, with some shallots,  which will slowly caramelize at the same time, and lend delicious depth to this dish. What I love is that you can easily make this for just one or two people, or a huge crowd, depending on how many zucchini you use. Here's the super simple recipe:

Ingredients:
Count one medium zucchini per person, using a mix of yellow, green and stripped varieties, if you can find them, and slice them thinly.
Count one thinly sliced shallot per 3 to 4 zucchini
Olive oil
Butter

To prepare:
In a large shallow pan heat a drizzle of olive oil and a couple of tablespoon of butter.
Add veggies and shallots, season well with salt and pepper, and cook, stirring often, over medium low heat, until lightly browned and caramelized, about 20 minutes, and serve immediately with dishes of your choice.

Enjoy!


2 Comments

Creamy Fusilli with Asparagus and Herbs

5/11/2017

2 Comments

 
Picture
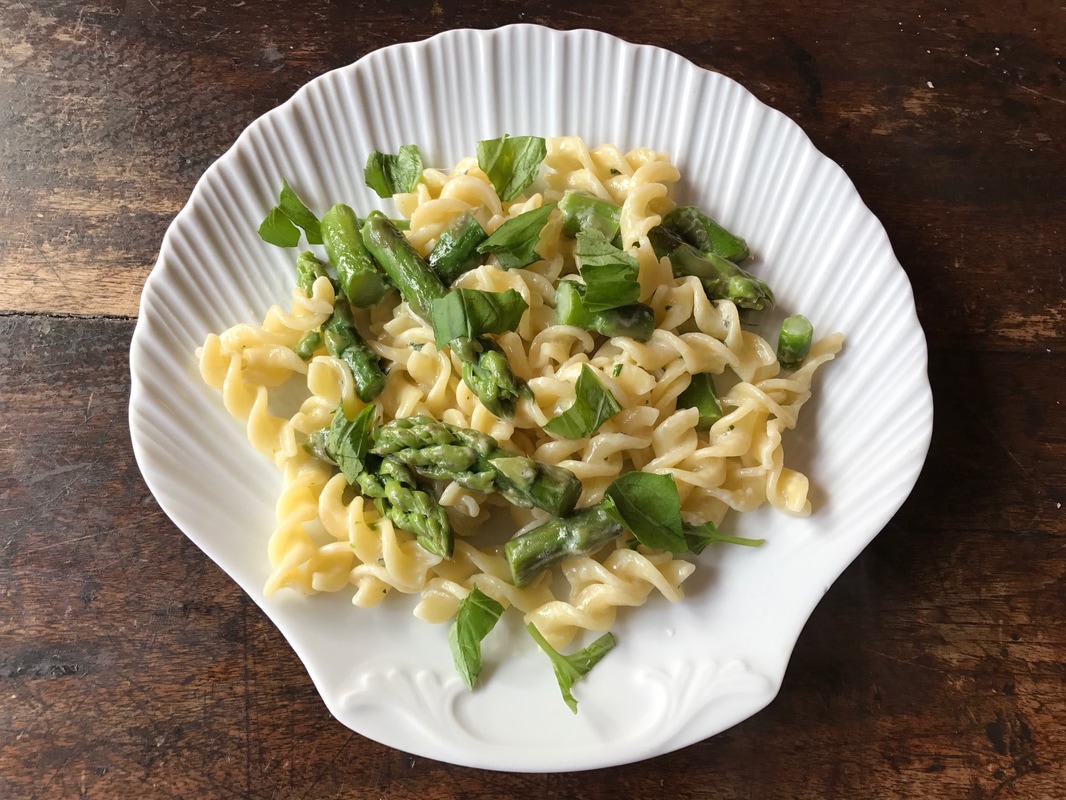
Here's a fifteen-minute weeknight meal that's bursting with fresh, fragrant spring flavors, light yet satisfying, and totally addictive. It's so easy to make, this recipe doesn't even call for a lengthy ingredient list. To prepare, cook 1 lb of dry fusilli  pasta according to package directions in a large pot of boiling salted water. Meanwhile, in a separate wide, shallow pan, in 2 inches of boiling water, cook 1 bunch of asparagus spears, bottom ends broken off and discarded, for about 5 minutes or until softened about half-way, but still firm in the middle. (We prefer the wider spears for this dish, because they have a meatier texture and more crunch).
Drain the cooked asparagus and chop into 1 to 2 " chunks. When pasta is cooked, drain, reserving a half a cup of the starchy water. Combine pasta with asparagus chunks, add 3 tablespoons of butter, a drizzle of heavy cream, 2/3 cup of grated pecorino and parmesan cheeses mixed together, and 1 tablespoon each of chopped fresh sage and rosemary. Stir well over low heat to combine for a minute or two, adding a splash of pasta water back to the pan to moisten, as needed. There's nothing more to this!
Serve immediately with a garnish of fresh torn basil leaves, and extra grated cheese if you wish. A glass of cold, dry white wine pairs perfectly with this dish, if you're of age.

Happy spring!
2 Comments

Jerusalem Stuffed Eggplant and Tomatoes with Lamb and Mint

5/8/2017

5 Comments

 
This dish reminds me of the delicious flavors of my childhood in north Africa, but in fact it's a recipe slightly adapted from two separate cookbooks about food from Jerusalem: The Flavor of Jerusalem and Jerusalem, A cookbook. In their versions, this meal is made only with eggplant, but since our daughter is not a fan of that particular vegetable, I make this two ways, with a tomato version at the same time, and personally, I find both unique and delicious in their own way. Though the eggplant version takes about 2 hours to cook, in total, the stuffed tomatoes cook much more quickly, and can simply be made on their own, as a whole family dish, if you are in more of a rush. Here's how to prepare them both, either at once or separately:

Ingredients: 
2 medium eggplants cut in half, lengthwise (count an eggplant per person, or two if they are small) 
2 medium tomatoes (or two per person, depending on how many you are cooking this for) tops cut off, and partially scooped out inside. 
4 to 6 tablespoons olive oil
2 teaspoons ground cumin
2 teaspoons sweet paprika
1 1/2 teaspoons ground coriander
1/2 teaspoon cinnamon
1 medium onion, chopped
6 garlic cloves, chopped
1.5 pounds ground lamb
3 teaspoons tomato paste
2 1/2 teaspoons sugar (for just tomatoes, you can cut this in half. The eggplant gets a bit bitter without this though, we've tried it)
juice of 1/2 a lemon
3/4 cups water
salt and pepper
1 handful each fresh cilantro and fresh mint, chopped and mixed together
Cooked white or brown rice

To prepare: 
Preheat the oven to 425 degrees.
Place the eggplants, skin side down, in a roasting pan along with the tomatoes. Or, you can place each tomato in it's own round ramekin baking dish for easier serving later, if you have these.
Drizzle vegetables with a little olive oil, season well with salt and pepper, and roast about 15 minutes in the oven while you prepare the lamb mixture.
In a skillet, heat a tablespoon or two of olive oil, and sauté the onion and garlic lightly for about 5 minutes with half the sugar and spice mixture, over medium heat.
Add the ground lamb, seasoning the meat well with salt and pepper, and stir, cooking, until it's no longer pink. 
Add the tomato paste and cook another couple of minutes, then turn heat off and let cool a moment while you remove the vegetables from the oven.
Mix remaining sugar and spice mixture with water and lemon juice, and pour this into the bottom of the roasting pan (pouring just a little in each tomato ramekin, if you are using these).
Spoon a generous portion of lamb on top of each eggplant and into each tomato, and cover tightly with aluminum foil.
Reduce oven temperature to 375 degrees and bake tomatoes for 30 minutes longer, eggplants for an hour and half, until completely soft and sauce has thickened.
As they cook, check the eggplant twice to ensure that there is still some liquid in the bottom of the roasting pan, and use this as a baste. Add a little more water to the dish for moisture, if needed. Be vigilant with this step; I waited too long to check the liquid my first try, and the spiced burned onto the bottom of the pan, which gave the whole dish a bit of a bitter taste.

Garnish generously with chopped cilantro and mint, and serve with side of rice.
While the tomatoes taste amazing when hot out of the oven, or warm, the eggplant is best left to cool slightly, and eaten either warm or room temperature.

Enjoy!


5 Comments

Curry Ginger Butternut Squash Soup

3/19/2017

3 Comments

 
Our kid hates squash (it might be her least favorite food of all time, honestly), but this soup is sooo good, it even fooled her for almost half a cup today. And although spring might be just around the corner, you wouldn't know it from the mountains of ice on the streets, the stuck cars, or the frigid temperatures here these days. When winter just won't quit, try this extra-tasty, perfectly warming and transporting Indian-inspired soup for lunch, brunch or dinner.

To cut the butternut squash without losing a fingertip (as I almost have, too many times), chop it in half first, so you can set it vertically, with a flat side down, on your cutting board, and slice off the peel carefully with a sharp knife. Discard seeds and cut squash into cubes of equal sizes. I do not recommend using frozen squash for this. In our experience, it's watery and flavorless every time. Some stores sell fresh packaged squash that's been pre-peeled and cubed, if you are in a hurry, though, and that works perfectly.
Here's how to throw this quick, delicious dish together in under 20 minutes:

Ingredients: (makes about four bowls)
1 large butternut squash, peeled and cubed
1 small onion, chopped
3 large garlic cloves, chopped
4 to 6 cups of chicken stock (or vegetable, to make this vegan or vegetarian)
2 inches of fresh ginger root, peeled and grated finely on a microplane (about a tablespoon)
1 teaspoon ground turmeric
1 teaspoon ground paprika 
1 teaspoon curry powder
2 bay leaves
olive oil and butter (butter optional)
fresh bread such as baguette to serve with (optional, but not in our home)

To prepare:
In a stock pot, heat a couple of tablespoons each of olive oil and butter, add onions, and sauté over medium heat for 2 to  3 minutes.
Add chopped garlic and cook another 2 minutes.
Add butternut squash cubes and all the spices, and season well with salt and pepper. 
Pour in enough broth to cover squash fully, toss in 2 bay leaves, and bring to a boil.
Simmer soup, half-covered, for 12 to 15 minutes or until squash is just cooked through but not too mushy.
Discard bay leaves and blend hot soup until creamy and smooth (we use a handy hand blender), and serve immediately with a side of crunchy fresh bread for dunking.
(Note: this soup travels and freezes extremely well, so if you like it, double the recipe next time, and enjoy at work, school, or as a super-fast weeknight freezer dinner any dark and cold night.)

Here's to good health, great flavor, heartwarming food, and making it through another long winter. 


3 Comments

Pasta with Mushroom Cream Sauce

3/9/2017

32 Comments

 
Here's a perennial favorite 20-minute dinner in our family: Pasta with mushroom cream sauce. Admittedly, this dish is much more interesting when made with a variety of fresh wild mushrooms, like chanterelles which I used to forage with my grandmother in the spring, in Germany. But because we live where we do now, we need to make due with what we've got. And at the moment, that's fresh shiitake and cremini only. Usually I have dried porcini on hand to include, but not today. Still, the dish tastes delicious, and what's better than a family meal that's on the table in well under 30 minutes? Here's how we make this creamy comfort food, in case you're hungry and in a hurry:

Ingredients:
1 pound of pasta
2. 5 to 3 cups of fresh chopped mushrooms (a mix works best)
3 garlic cloves
2 small shallots
1 cup heavy cream
1 bay leaf
3 tablespoons olive oil
2 tablespoons butter
fresh thyme, marjoram or chives

To prepare: 
Boil a large pot of water to cook your pasta in.
In a large shallow pan, heat 3 tablespoons of olive oil and 1 tablespoon of butter, and toss in mushrooms, seasoning well with salt and pepper.
Sauté mushroom for about 5 or 6 minutes, then add chopped shallots and garlic, stir, and keep cooking on medium low heat another 5 minutes.
Meanwhile, add pasta to boiling, salted water and cook according to package directions.
Add 1 cup of cream to sauce, and season again with salt and pepper.
Add bay leaf and a few sprigs of fresh thyme and / or marjoram to sauce, and simmer on low for about 5 to 7 more minutes, while pasta finishes cooking.
Add cooked pasta (reserving water) directly into sauce pan, with another tablespoon of butter, and cook, stirring to combine, over low heat for a minute before. If pasta looks like it needs a bit more moisture, add a half a cup of the reserved pasta water, and stir in well.
Serve immediate with grated parmesan or pecorino cheese, and a glass of wine, if you like that sort of thing, for the adults, because a meal this good, and this quick, is worth celebrating.
Cheers!

32 Comments

Top Blade Steak Dinner

3/3/2017

2 Comments

 
When it comes to steak dinner, you may think there's little room, or need, for reinvention. I agree. But the other day, I found myself in a family-owned butcher shop in Brooklyn that's been around for generations, and that carries every cut of meat imaginable, and I couldn't resist the urge to try something new. This top blade steak so was tender, juicy and delicious, and so affordable compared to standard prime cuts, like fillet or rib eye, that we all decided immediately this is our new favorite. No matter what sort of steak you cook, it's all about the technique and the sides, I believe.
To prepare, heat up a cast iron skillet and add just a splash of good olive oil. Sear the meat on high heat for a couple of minutes, then cover and turn the flame to medium until you can see, by the color on the side of the steak, that it is cooked about half way through. (The meat will turn from red to brown, as it cooks).
Flip the steak and cover again for just a couple of minutes more. Add a few springs of rosemary or fresh thyme at the end, and a bit of butter. Using a spoon, baste the  steak in the herb-infused juices and melted butter, until cooked to the internal temperature you prefer, be it rare, medium rare, or more well-done. A good trick to test how raw meat is, by hand, is gently pressing on the middle of the steak. If it feels firm, or is getting firm, it's close to well-done. Definite medium, already. The softer the meat feels, the more rare it is inside. A thermometer can give you an accurate reading, of course.
As sides, we enjoyed this with swiss chard and shiitake mushrooms, sautéed in olive oil with chopped garlic and shallots--a nice twist on boring old spinach. Boiled small new potatoes, lightly tossed in olive oil with fresh herbs, make a delicious, simple and quick starch to complete this meal.

​Enjoy!
2 Comments

Beignets

2/5/2017

4 Comments

 
When our daughter was first diagnosed with multiple life-threatening food allergies in infancy, eight years ago, many fears kept me up at night, among them the very real worry that she would go through childhood without a donut. Thankfully, support and hope came in many forms. And at the back of a cookbook titled Bakin' Without Eggs, by Rosemarie Emro, gifted to us by a helpful relative, I found this simple, delicious egg-free recipe that we enjoy sometimes on weekend mornings, or festive occasions, when a beignet is in order. Here's how to make your own, which can also be vegan if needed, per my notes below:

Batter ingredients:
Vegetable oil for frying
1 1/2 cups unbleached flour
1/3 cup sugar
3 1/2 teaspoons baking powder
1/4 teaspoon salt
1 1/2 teaspoons vanilla extract
1/4 teaspoon each ground cinnamon (& nutmeg, optional)
3/4 cup milk (substitute with rice milk, soy milk, or other vegan option if you wish)
11/2 teaspoon lemon juice
2 tablespoons vegetable oil

Topping options
confectioners sugar
sugar
ground cinnamon
lemon juice
chocolate sauce
strawberry jam

To prepare:
Combine batter ingredients in a bowl and mix well. (Batter should be moist but not too runny. If it is too moist, add a little more flour).

In a medium saucepan, pour about 4 inches of oil and heat to 375 degrees F, using a candy thermometer. (It's imperative to use a thermometer; if oil is the right temperature, the dough will not absorb any oil. But if it's too hot, it will smoke and donuts will not cook properly.)

Drop 1 small spoonful of batter at time into the hot oil. Deep fry just three beignets at a time, and keep checking the thermometer and adjusting the heat as needed.

Fry donuts for 1 minute or until they rise up and float. Then gently flip with a slotted spoon and fry other side until  brown, about another minute.

Remove from oil with slotted spoon and drain on paper towels.

For toppings:
Depending on your preference, either heat up chocolate sauce or jam briefly in a pot or microwave and drizzle over beignets, or serve on the side for dipping.
We often prefer to simply dust the donuts with confectioners sugar, using a sifter, or dip them in a mix of plain sugar and cinnamon, while still warm but not too hot so the sugar melts.
Sometimes, we make a 10-second glaze by mixing a couple of tablespoons of confectioners sugar with a good squeeze of lemon juice, and whisking this into a tart, gooey and sugary paste. (See slideshow photos for some ideas.)

No matter what the occasion, nor how you eat them, these sweet, memorable treats are extra special for kids limited by food allergies, and quick and fun to make, too.


4 Comments

Magic Chicken Soup

1/27/2017

3 Comments

 
The dreaded winter stomach "flu" is back with a vengeance once again. In national news last week, schools in several states were closed due to the number of kids and educators falling ill. In our daughter's second grade class, about 20 percent of students have been out sick each day recently. As of yesterday, her teacher is bedridden, too. Hand washing aside, there's not much anyone can do to avoid the winter germs that bombard us. But short of having a magic potion  to offer you, I do have this: A foolproof chicken soup recipe, that helps fight off whatever ails us, and speeds recovery, too. This recipe makes enough for a satisfying dinner for four people, plus plenty of leftover broth to freeze, so you'll have several cups-full handy should the flu come knocking on your door anytime soon.

Broth ingredients:
One small to medium sized (organic) whole chicken
5 or 6 medium carrots, peeled and chopped into round slices
3 celery ribs, also chopped
1 large onion, roughly chopped with skin still on
5 to 6 garlic cloves, peel on, smashed and roughly chopped
A couple sprigs of fresh rosemary, thyme and sage
2-3 fresh bay leaves

 Optional soup additions for dinner:
1 bunch of swiss chard or fresh spinach leaves
1 cup of cooked rice (either brown or white rice, or barley, or noodles if you prefer.)
Parmesan cheese
Nutmeg
1 bunch of fresh chives

To prepare:
In a large pasta or stock pot, sauté chopped onion (with skin on, which adds richness of flavor and color), garlic cloves, and 1 1/2 chopped carrots and celery ribs in a couple of tablespoons of olive oil. Season with salt and pepper, and  stir over medium heat for 3 to 4 minutes.
Season whole raw chicken well with salt and pepper inside and out, and add to pot with fresh herbs and bay leaves.
Add about 10-11 cups of water, or until chicken is fully immersed.
Cover pot with lid and bring to a boil, simmer, stirring and skimming off any impurities occasionally, for about 30 minutes or until chicken is cooked through.

(Meanwhile, cook rice, barley or pasta separately, according to instructions, if you wish to add these later).

Turn off stove, remove the chicken from the broth, and set aside in a bowl to cool.

Carefully strain broth through a fine-meshed sieve and discard all the veggies and herbs, reserving only the liquid.

Save part of broth for freezing in a separate container, if you wish, and return broth for your super to stock pot.  

Bring back to a boil, and add remaining carrots and celery. Simmer for about 4 minutes, then add in chard or spinach and cook another 2 to 3 minutes, until vegetables are just softened.

Serve soup in bowls, adding cooked rice or pasta, and shredded chicken bits, (skin discarded).
Top with finely chopped chives, a pinch of freshly grated nutmeg, and parmesan cheese, to complete the dish. 

Here's to making it through another winter in good health, and to all the delicious food that keeps us going, no matter what hurdles we face.


3 Comments

Beet Greens and Roasted Beets

1/22/2017

1 Comment

 
I'm not sure which we like to eat better, the beets or the greens. Each has their own unique, delicious flavor, and they are both exceedingly easy to prepare, and really healthy, too. But one thing is definite: beet greens are the lesser valued, often tossed side of this edible plant, and that's both a tremendous waste, and a shame. In fact, beets are often sold without the greens, as these are a sure sign of how fresh (or not) the root veggies are. While beets will last quite a while in the fridge, like most other root vegetables, the greens are more delicate, and should be eaten as soon as possible. Just one small bunch of baby beets, like the one pictured above, yields a whole beautiful mass of edible leaves. Here is how we enjoy eating them, and if you've never tried them, we highly recommend you give them a taste. Both the beets and the greens pair perfectly with most proteins, grains and starch you might be preparing for lunch, brunch or dinner, any day:

Ingredients:
1 to 2 bunches of small beets, with fresh looking greens still attached
olive oil

To prepare:
Preheat oven to 425 degrees
Chop greens off of beets
Scrub beet roots with water and rinse well,  to remove any dirt (tips trimmed off, so you are left with a roundish shape)
Rinse greens well, in a salad spinner
Place beets (only) on tin foil, drizzle with a little olive oil, season with salt and pepper, and wrap up in foil, sealing all sides tightly. 
On a baking sheet, roast beets in foil in hot oven about 30-45 minutes, depending on size of your beets (they are done when you can slip a sharp knife tip through easily). 
When beets are done, let cool until you can handle them, and peel off ouster skin.
Meanwhile, heat a large frying pan, drizzle in some olive oil, and sauté the beet greens for just 5 to 7 minutes, as you would spinach, for instance.
Season with salt and pepper, and serve right away with protein and / or grains of your choice, and whole or sliced beets, if you wish. (We've enjoyed these with quick weeknight dishes like lamb chops, chicken breast, or tossed into pasta and served with parmesan cheese, or with barley and cubed roasted sweet potatoes.)
You can also skip the sauté, and add the greens to any soup or stew, at the last few minutes.
​
Enjoy!


1 Comment
<<Previous
Forward>>


    ​Related Articles
    ​

    For the New York Times for Kids, I reported on tasty ways 5 Different Hot Chocolates from Around the World are prepared and savored. 

    For the Washington Post Kids Post, I spoke to an edible bug expert in Brooklyn, and wrote about how we can eat our way to sustainable future—with an important caveat and warning at the end, for those of us with food allergies!

    This old-school parenting hack I wrote about for LifeHacker will make your breakfasts a breeze, and allow for two family meals, some days.

    My essay about leaving my career to cook for my allergic kid, published by Allergic Living magazine.

    My essay about the challenges of holidays with How the Grinch almost stole our gingerbread house.
     

    About the Author

    I'm Lorraine Allen, and when our daughter was diagnosed with multiple severe food allergies in infancy, a decade ago, I decided to freelance from home so that I could also care and cook for her. Because I grew up all around the world, it's important to me that she be able to enjoy all sorts of international food.  I've learned, throughout this process, that even a large number of severe allergies and restrictions does not stop a person from eating well. On the contrary, by forcing us to focus so much attention on what we consume, we've gained a whole new appreciation for good food, and ironically, we all enjoy a healthier diet than before this diagnosis. This site is where we share some of our delicious egg-free, nut-free, shellfish-free (and often vegan and gluten-free) experiments and successes in the kitchen. Guten Appetit and thanks for reading!

    RSS Feed

Powered by Create your own unique website with customizable templates.